Showing posts with label Recipe. Show all posts

May 31, 2011

Strawberry Summer Cake

I haven't had the slightest urge to take on any cooking or baking, let alone, attempting new recipes. I'm mostly tired and usually find other stuff that is more pressing but last Wednesday I decided I needed to make this Strawberry Summer Cake. I had basically everything on hand and we had an impending tornado warning/severe thunderstorm alert and, so, to keep from freaking out I baked!

The recipe comes from my absolutely favorite cooking blog Smitten Kitchen! She has a book coming out either in the Spring or Fall of 2012 and I can't wait. I love her pictures, her posts, and her recipes! Honestly, I wish we were friends! Ha! I followed this recipe to the "T" without changing anything up. If you want to see SK's original post it's linked above.

Strawberry Summer Cake

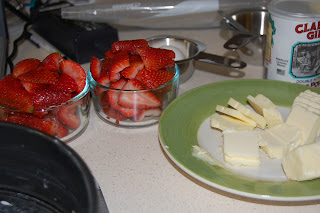
6 tablespoons unsalted butter, at room temperature, plus extra for pie plate

1 1/2 cups all-purpose flour
1 1/2 teaspoons baking powder
1/2 teaspoon table salt
1 cup plus 2 tablespoons granulated sugar
1 large egg
1/2 cup milk
1 teaspoon anilla extract
1 pound strawberries, hulled and halved

Directions

1. Preheat of to 350 degrees. Butter up either a 9"-10" pie plate or springform pan (which I used)


2. Whisk the flour, baking soda, and salt in a bowl.  In a larger bowl, mix 1 cup of sugar with the butter, for about 3 minutes, until fluffy. Mix in the egg, milk, and vanilla until just combined and then gradually mix in the flour mixture until it's smooth.

3. Pour the mix into the pan and then arrange the strawberries, cut side down, on top and as close as possible. Then sprinkle 2 tablespoons of sugar over the berries.

4. Bake cake for 10 minutes and then reduce the temperature to 325 and bake for 50-60 minutes or until the tester comes out clean. Let it cool in the pan.


Smitten Kitchen suggests serving it with whipped cream, which I didn't try but I'm sure is also good! I served it with sprinkled powder sugar, which gave it just enough sweetness, and I also thought about using vanilla ice cream as another alternative!! Definitely an easy cake and one that I will be making again. It was D.E.L.I.C.I.O.U.S!

May 04, 2011

PB Chocolate Chip Cookies.

Since we've moved into our new house I haven't really baked or really cooked anything other than spaghetti, tacos, meatballs, anything super easy. My culinary curiosity is at a standstill and I blame it on fatigue and doing other things with the house but last night I must've gotten a second wind after I finished sanding down the last two drawers to the dresser because I wanted to bake something.

I decided to make the "Flourless Peanut-Butter Chocolate Chip Cookie" recipe from the Dec. 2010 edition of Southern Living. I was intrigued by the non use of flour and butter and how easy it looked.

Flourless Peanut-Butter Chocolate Chip Cookie
1 cup of creamy peanut butter
3/4 cup of sugar
1 large egg
1/2 tsp. of baking soda
1/4 tsp. of salt
1 cup semisweet chocolate morsels
Parchment Paper

Directions
1. Preheat the oven to 350 degrees. Stir together the peanut butter and the next 4 ingredients until well blended.

2. Stir in chocolate morsels (note: I added a handful more of morsels than the recipe called for and I ended up throwing them away because it was to many for the peanut butter mixture)
3. Drop dough by rounded tablespoons 2 inches apart on parchment paper lined cookie sheet. The recipe says for more ease to spray the tablespoon with cooking spray but I found this to be more messy.

4. Bake at 350 degrees for 12 to 14 minutes or until puffed and lightly browned. Cool on baking sheet for 5 minutes and then move to wire rack and cool for another 15 minutes (note: I don't have a wire rack so I let them cool entirely on the baking sheet and they were fine).

Voila!
This recipe was really easy but because there was no flour the mixture tended to fall apart more easily. I ended up mixing the cookie "dough" before I scooped. They didn't make nice ball shapes but they came out looking like a chocolate chip. Try it! They're not bad just extra peanut buttery =) I'll have a pic a day later ♥

January 26, 2011

Some Cold Weather Stew

Remember (if you read it) in my last post I said I cooked up a wonderful stew using a new recipe? Well, I'm going to post about it today. It seems snow is hitting every region of the country and this is perfect for that kind of a day.

I've only been following Wearing Gackey's Apron for a few months but her recipes are delish and I took her "Snow Day Stew" for a whirl and I loved it, as did everyone else.

Here's her recipe and directions, as they are on her blog.

Crock-Pot Beef Stew

1 1/2 lbs stew meat, cut into chunks
1/4 cup butter
1 (10 1/2 ounce) can tomato soup
1 (10 1/2 ounce) can water
3 carrots cut into chunks
3 large potatoes cut into chunks
2 stalks celery cut into chunks
2 onions cut into chunks
2 teaspoons salt
1 teaspoon black pepper
1/4 cup red wine
2 bay leaves
Nature’s Seasoning (to taste)

Directions:Brown the beef in the butter over medium high heat in pot or skillet on top of stove.

Transfer to crock pot. Add the soup and water and stir. Then add the rest of the ingredients to the crock pot.

Cook on high for about 5 hours.


*So I didn't have Nature's Seasoning and instead added garlic powder and it tasted good.*  Definitely try this recipe out and check out Miss Brittney's recipe blog!

December 28, 2010

A Real Simple Apple Pie

I wanted to make this pie for Thanksgiving but I didn't own a food processor until my birthday so I made it for Christmas Eve instead! It was oh-so-delicious and gone by the end of the weekend! I got the recipe out of my favorite magazine Real Simple. Here's the recipe:


Ingredients

Homemade Piecrust or 1 store-bought piecrust, fitted into a 9-inch pie plate
1/2 cup cup cold unsalted butter (1 stick), cut into small pieces
3/4 cup plus 1 tablespoon all-purpose flour, spooned and leveled
3/4 cup granulated sugar
2 1/2 pounds apples (about 5; such as Granny Smith, Braeburn, or Empire), peeled and thinly sliced
1 tablespoon grated fresh ginger
1/4 teaspoon ground cinnamon
1/4 teaspoon kosher salt

Directions1.Set an oven rack in the lowest position and heat oven to 375ยบ F. Place the pie plate on a foil-lined baking sheet.
2.In a food processor, pulse the butter, ¾ cup of the flour, and ¼ cup of the sugar until large clumps form. Transfer to a bowl and refrigerate until ready to use.
3.In a large bowl, toss the apples, ginger, cinnamon, salt, and the remaining ½ cup of sugar and tablespoon of flour.
4.Transfer the apple mixture to the crust, sprinkle with the crumb topping, and bake until the top is golden and the apples are tender, 55 to 60 minutes. Serve warm or at room temperature.

You can definitely taste the real ginger in the pie. I used a store bought pie crust and it was still good!! I promise!

November 18, 2010

Taste Tester

I have a newly appointed taste tester!


Isn't he cute?! 
His mommy attempted in making homemade icing
and by the looks of Logan eating the frosting
I must've done a good job!
Yay!

If you're curious I made a Vanilla Frosting from Everyday with Rachel Ray
Apparently this recipe is from the confectioner's sugar box but anywho here it is:

Ingredients:

2 1/2 sticks (10 ounces) unsalted butter, at room temperature
5 cups confectioners' sugar
1 tablespoon pure vanilla extract
1 to 2 tablespoons milk  (I did 2 tbsps)

Directions:

1.In a large bowl, using a mixer, beat the butter on medium speed until creamy, about 1 minute. Add the confectioners' sugar, 1 cup at a time, beating until smooth after each addition. Add the vanilla and 1 tablespoon milk. Beat at high speed until fluffy, adding an additional 1 tablespoon milk if necessary.

August 05, 2010

Wholesome Goodness!

It's a million degrees outside and my goal today was to bake! Yes, bake! I made a chocolate-everyday cake, or at least that's what Smitten Kitchen dubbed it! I have no idea how it tastes because I just made it but it smells amazing in here! So if it's anything like it smells I'm betting that it'll be good! Click on the link for the recipe and to check out Smitten Kitchen's blog! I love her recipes!

In the oven.

On another good note, I landed a job. It's part time with room to grow and be full time, which is good too. At least I won't be anxious in wondering how I'm going to pay my astronomical student loans!

(Did I mention I love Grey's Anatomy?
I more than love it. If it went off air I would cry!
But anyway, this is what I felt like doing today!)

July 15, 2010

CHEESE!!!-cake

My love for cheesecake is immeasurable. I've tried many cheesecakes because who can go wrong with cheesecake. My favorite cheesecake is made by Delicious Orchards, a country farm market in Colts Neck, NJ. They have a topping of, what appears to be a, sour cream/sugar concotion which makes oh so delightful. Their cheesecake pie was always a traditional staple at our Thanksgiving dinners when we were growing up. I have no idea what made me want to make one but I did, even though I thought it was a daunting task!

One of my favorite blogs to read, Delicious Dishes, had recently posted a simple cheesecake recipe. Her pics looked so good and it sounded so easy I decided to take on her recipe. I wanted to see too if I could find a recipe for the Delicious Orchards topping (they keep it top secret too)! So I was Googling (I love Google) toppings when I found a website (Joy of Baking) that had a cheesecake topping recipe so similar to the famous D.O.

Recipe (Adapted from Delicious Dishes & Joy of Baking)
New York Style Cheesecake

1 cup honey maid graham cracker crumbs
3 T sugar
3 T butter or margarine, melted
5 pkg (8 oz each) Philadelphia Cream cheese (any brand will do), softened
1 C sugar
3 T flour
1 T vanilla
1 C sour cream
4 eggs
Topping of your choice
Crust:
Mix crumbs, 3 T sugar and butter; press firmly onto bottom of 9-inch springform pan. Bake at 325 for 10 minutes.

Filling:Beat cream cheese, 1 C sugar, flour and vanilla with electric mixer until well blended. Add sour cream; mix well. Add eggs, one at a time, mixing on low speed after each addition just until blended. Pour over crust.

Baking:Bake at 325 for 65 minutes or until center is almost set. Loosen cake from rim of pan; cool before removing rim. Refrigerate 4 hours or overnight. Spread topping over cheesecake and garnish as you please before serving.


Topping:1 cup sour cream (not low fat or fat free)
2 tablespoons granulated white sugar
1/2 teaspoon pure vanilla extract

In a small bowl combine the sour cream, sugar, and vanilla extract. Spread the topping over the warm cheesecake and return to oven to bake for 15 more minutes. Remove from oven and carefully run a knife or spatula around the inside edge of pan to loosen the cheesecake.
My finished result...Ok so maybe the topping didn't work out the way I thought it would...We'll have to do something different next time!! It seemed to have pooled in the middle of the cheesecake..Gr. Owell since it has to sit in the fridge for 4 hours I won't know how it is.. Hopefully it tastes better than it looks =)  I can't believe I posted an entire post on cheesecake!! Ha!

July 09, 2010

Oh So Delish!

Whoa! I've taken a back seat to blogging, huh? I think I've been in a blogging funk although I have come on to read my favorites!

Last night I made the most delicious, easy, and colorful (summerish) dish and all courtesy to Giada DeLaurentiis!! I love Giada, her products, her food, well I could go on forever! Ha! Now it looks intense but trust me it's not!! I almost didn't make it because it looked intense! I made no changes except that I only used one bag of peas and thought it was too much! Oh and where it says serve immediately, do so!! I waited for Chris to buy the cheese and it was done long before he came home and it got cold fast, even so it still tasted good!! So here it is & Bon Appetit!

Pasta with Tomato and Peas

(Their picture =)

(My picture, not quite like there's but I didn't want my sauce completely watered down!)
Ingredients

•1 pound linguine
•3 tablespoons extra-virgin olive oil
•3 shallots, chopped
•2 garlic cloves, minced
•1 carrot, diced
•1 teaspoon salt
•1 teaspoon freshly ground black pepper
•5 tablespoons tomato paste
•1/2 teaspoon dried oregano
•1 teaspoon dried thyme
•1 teaspoon dried parsley
•1 1/2 cups frozen peas, thawed
•1/4 cup grated Parmesan
•1/4 cup grated Romano

Directions
Bring a large pot of salted water to a boil over high heat. Add the pasta and cook until tender but still firm to the bite, stirring occasionally, about 8 to 10 minutes. Drain the pasta, reserving 2 cups of the pasta water.

Meanwhile, heat the oil in a large nonstick frying pan over medium heat. Add the shallots, garlic, carrots, salt, and pepper. Cook until tender, about 8 minutes. Add the tomato paste and 1/2 cup of the hot pasta water. Stir to melt the tomato paste and create a sauce, adding more pasta water if necessary. Stir in the oregano, thyme, and parsley. Gently fold in the cooked pasta, peas, and the cheeses, adding more reserved pasta water if necessary. Transfer to a platter and serve immediately.

June 17, 2010

Yummers & Popsicles.

Today I decided to use the crock pot to make dinner. I love my crock pots. I firmly believe that EVERYONE should own and use it all the time! It's what made me start to like and want to cook! Tonight I made Cuban braised beef and peppers from the December 2009 issue of Real Simple ( I love this mag. just about as much as I love my crock pot =)
(Here's what you'll need)

Cuban braised beef and peppers
Ingredients

1 28-ounce can diced tomatoes, drained
2 red bell peppers, sliced 1/2 inch thick
1 onion, cut into 8 wedges
2 teaspoons dried oregano
1 teaspoon ground cumin
kosher salt and black pepper
1 1/2 pounds flank steak, cut crosswise into thirds
1 cup long-grain white rice
1 avocado, sliced
1/4 cup fresh cilantro leaves

Directions
1.In a 5- to 6-quart slow cooker, combine the tomatoes, bell peppers, onion, oregano, cumin, 1½ teaspoons salt, and ¼ teaspoon pepper. Nestle the steak among the vegetables. Cook, covered, until the meat is tender and pulls apart easily, on high for 4 to 5 hours or on low for 7 to 8 hours.
2.Twenty-five minutes before serving, cook the rice according to the package directions.

3.Using two forks, shred the beef and mix it into the cooking liquid. Serve with the rice and top with the avocado and cilantro.
(Here's the finished result and it looked almost like theirs to the tee!)
**NOTE: I didn't use the cilantro because I'm not a huge fan but I LOVE me some avocado, again something that is optional! It was delicioso!! We've decided to try a pork roast next time because the steak was a little tough. I cooked it on high for 5 hours so we're going to see if cooking it on low for 7-8 will be any better!! Hope you enjoy this one!

On Tuesday I went to a scrapbooking class, being taught by one of my blogger friends Liz, that was teaching how to create quick layouts. One of the layouts we did was of popsicles and it made me want one, Ha! So tonight after dinner we went on the balcony and Logan had his first popsicle, EVER! At first he bit right into it and didn't want anything to do with it but he saw my sister and I eating them and then he got the hang of it and went to town! By the end he was a hot mess and he shook his popsicle so hard that it fell into pieces!! He looked bummed too!


June 04, 2010

Birthday {Fun}

So Chris' birthday was today and I wanted to make it extra special esp. since it's his first birthday away from his family. All week I asked him what he wanted and every time I got an answer that was frustratingly not an answer. All I got was Devil's Food Cake. So I made him a Devil's Food cake with chocolate icing on the outside, with sprinkles, and firefighter candles!
And on the inside there was vanilla icing! Chris called it a giant Devil Dog.

For dinner I made Chris pork fajitas. They smelled delicious and tasted even more delicious! I've linked the web address for the recipe. Just a note: Instead of 3 tbsp of seasoning I used a whole packet!

These are my favorite pictures from tonight.
Logan's hair is crazy!!
A mini-book I scrapped for Chris. I'll post the whole thing later.
His face is priceless! I love this man!
My chocolate mess baby! I love it!
I succeeded at a small intimate birthday for my love. He had balloons, yummy food, cake, pistachio pudding, and thoughtful gifts! At the end of the day all that matters is that he's happy and I succeeded in doing that!

June 03, 2010

Finally!

I'm able to blog again. I have been without a computer for what felt like weeks but was only 2 days or so. This weekend we went to my mom's and I left my computer charger there! UGH. My battery life is a max of 2 hours and it was already halfway used up. I would only go on to check things real quick and get off but it happened. The computer died and I felt like I'd been disconnected from the world. But it came today, finally! So now I'll quickly sum up a relaxing weekend, a delish meal, and plans for my sweetie's bday!

(photo courtesy of Google)

Relaxing Weekend:
Memorial Day weekend was RELAXING. It was nice to be with my mom and see my grandparents and introduce Logan to farm animals. He wasn't to keen with donkeys and ponys (maybe because they were his height and came up to fast) but he loved the horses and the dogs, of course. We bought Logan a baby pool to cool off in, and, at first, he was scared, but we showed him that it was similar to bath time and, well, he took to it and didn't want to come out. We were home by Monday night and crashed! Even though it was a 4 hour drive it felt much longer!


Delish Meal:
Last night I made a chicken dish using a recipe that I read in --you guessed it-- Real Simple. Have I told you guys how much I love that mag?! Well, I do. I really need a subscription! Anywho, it was amazingly good! The name of the recipe is Spiced Chicken with Couscous Salad...Normally I would've have posted the recipe itself but since I feel the post is sorta long so I've attached the link! But I will post the pic since I plated it just like they did =)


Sweetie's Bday:Tomorrow is my sweetie's bday! I want to make it extra special because it's his first bday away from his family. My plan is to make him a pork fajita dinner (yum), make him a devil's food cake with chocolate icing on the outside and vanilla icing in the middle, and make him pistacchio pudding (not my favorite kind but he likes it and it's about him tomorrow). I'm also making him a flap book with pictures of him and Logan (it's intended to be a gift from Logan)! That's that. I have a busy day tomorrow! ♥

May 25, 2010

Double Yum, Idol & Glee

OMG before I get to the double yum stuff I'm going to rave about TV shows going on tonight!! The season finale for Idol is tonight [Team Lee Dewyze] & Glee is going Gaga (doing songs by Lady Gaga)! I'm so excited!! Ha!

Okay now for the real purpose of this blog! Tonight I made these yummy stuffed shells, with a recipe taken from my favorite mag, Real Simple! The last time I made any sort of stuffed shells I was taught by someone who didn't believe in measurements and just threw in ingredients. Needless to say I didn't retain any of that so when I found this recipe I was excited! It was so pretty & delish! Enjoy! ♥

Spinach and Ricotta-Stuffed Shells


Ingredients
20 jumbo pasta shells (about half a 12-ounce box)
1 24-ounce jar marinara sauce
2 15-ounce containers ricotta
2 cups baby spinach, chopped
1/2 cup grated Parmesan (2 ounces)
1/2 tsp. of kosher salt**
1/4 tsp. of black pepper
1/2 cup grated mozzarella (4 ounces)

Directions

1. Set an oven rack to the highest position and heat oven to 400° F. Cook the pasta according to the package directions; drain and run under cold water until cool.

2. Spread the marinara sauce in the bottom of a large broilerproof baking dish.

3. In a bowl, combine the ricotta, spinach, Parmesan, ½ teaspoon salt, and ¼ teaspoon pepper. Spoon the mixture into the shells and place them on top of the sauce. Sprinkle with the mozzarella and bake until the shells are heated through, 10 to 12 minutes.

4. Increase heat to broil. Broil the shells until the cheese begins to brown, 2 to 5 minutes. Serve with the salad, if desired.

**CHANGE UP: I like my shells extra cheesy so I added 1 cup of mozzarella cheese and reduced the salt to 1/4 tsp because of both cheeses, probably didn't even need the salt**
 
 
(photo courtesy of Real Simple)
Obviously not my photo but I'm telling you it looks just like that!!

And it must've been reallll good because my number one fan enjoyed it!!!

May 18, 2010

Yumm.

I made this tonight

It partnered up a rice and chicken plate

So delish, so colorful, so summer-y, did I mention really EASY!

Try it! Recipe is below! Enjoy!


Romaine Salad With Tomatoes and Bacon


Serves 4
Hands-on Time: 10m

Ingredients

4 slices bacon

1 head romaine lettuce, cut into strips (6 cups)

1 cup grape tomatoes, halved

4 scallions, sliced

4 to 6 tablespoons Creamy Parmesan Dressing or bottled Caesar dressing

1. In a skillet, cook the bacon over medium heat until crisp, 6 to 8 minutes. Transfer to a paper towel-lined plate. Break into pieces when cool. 2. In a large bowl, toss the lettuce, tomatoes, scallions, and bacon with the dressing.

LinkWithin

Related Posts Plugin for WordPress, Blogger...